Android Studio Gradle Configurations
여러 제조사 단말에 대한 처리 때문에 제조사별 라이브러리를 각각 포함시켜야 할 때, 이를 하나의 Android Studio Project 만 이용해서 build 를 하고 apk 를 생성하고 싶었다.
Product Flavor 기능을 이용하면 Source Set 에 대해서는 분리가 가능하다.
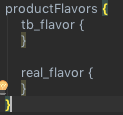
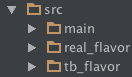
위 그림에서는 test-bed 용, 운영서버 용을 각각 tb_flavor와 real_flavor로 선언해주고 그에 따른 디렉토리를 생성해준 내용이다.
이렇게 하면 test-bed 용과 운영서버용의 URL 이라던지 서버별로 다른 설정을 각각의 Source Set 으로 관리할 수 있다.
그러나 라이브러리 디렉토리는 Source Set 에 포함되지 않고, 임의로 libs 디렉토리를 각각 Flavor 디렉토리에 추가해도 오류가 나거나 동작하지 않는다.
이런 상황에서 Configurations 라는 것을 알게되었는데 이를 통해서 각각의 다른 라이브러리들을 flavor 별로 빌드가 가능하다고 한다.
(special thanks to 조모씨)
Android Developer 에 그 내용이 설명이 되어 있는데 항상 그렇듯이 자세하게는 안나와 있어서 감이 팍 오지 않는다.
android {...}

  // Creates Gradle dependency configurations to use in the dependencies block.
configurations {
  // For variants that combine a product flavor and build type, you need to
  // intitialize a placeholder for its dependency configuration.
  freeDebugApk {}
  ...
}

dependencies {
    // Adds a compile dependency only to the "free" product flavor.
    freeCompile 'com.google.firebase:firebase-ads:9.8.0'
    // Adds an apk dependency only to the "freeDebug" build variant.
    freeDebugApk fileTree(dir: 'libs', include: ['*.jar'])
    // Adds a remote binary dependency only for local tests.
    testCompile 'junit:junit:4.12'
    // Adds a remote binary dependency only for the instrumented test APK.
    androidTestCompile 'com.android.support.test.espresso:espresso-core:2.2.2'
}
위 처럼만 간략하게 설명이 되어 있는데 configurations 항목을 보면 주석으로 설명이 되어 있다.\
이를 약간 더 풀어서 설명하면 아래와 같다.
- app 의 build.gradle 파일에 configurations 를 추가하고 그 안에
<product flavor이름>+<buildType : debug/release - >(옵션) +<gradle action>(Apk,Compile 등) 양식에 맞춰서 configuration 을 선언한다.
예를 들어 tb_flavor(Product Flavor) 에 대한 configuration 은tb_flavorCompile,tb_flavorDebugCompile혹은tb_flavorReleaseCompile와 같이 선언할 수 있다. - dependencies 에 해당 configuration 을 추가한다. 위 예시에서는 이렇게
freeDebugApk fileTree(dir: 'libs', include: ['*.jar'])선언을 해줬다.
(이는 free flavor 의 apk 생성시에 libs 밑에 있는 모든 jar 들을 dependency 에 추가하겠다는 내용이다.)
위 예제를 응용해서 제조사에 따라서 sec_flavor(삼성전자)와 lge_flavor(엘지전자)에 대한 configurations 를 구성하면 아래와 같이 된다.
내가 하던 프로젝트의 경우 예제와는 다르게 apk 생성시가 아닌 compile 타임에 dependency 가 추가되어야 해서 Apk 대신 Compile 을 suffix 로 사용했다.
android {
    ...

    productFlavors{
        sec_flavor{
            minSdkVersion 17
            targetSdkVersion 22
        }
        lge_flavor{
            minSdkVersion 17
            targetSdkVersion 23
        }
    }
}

configurations {
    sec_flavorCompile
    lge_flavorCompile
}

dependencies {
    sec_flavorCompile fileTree(dir: 'sec_libs', include: ['*.jar'])
    lge_flavorCompile fileTree(dir: 'lge_libs', include: ['*.jar'])
}
물론 위처럼 작성하고 gradle sync 하기 전에 app 디렉토리 밑에 sec_libs, lge_libs 디렉토리를 만들고 그 안에 각각 제조사 dependent 한 jar들을 넣어둬야 한다.
이렇게 설정해 두고 BuildVariants 만 알맞은 놈으로 세팅한 후 build 를 하거나 generate apk 등을 수행하면 하나의 소스로 제조사 별 apk 를 생성할 수 있다.
위의 설정에서 더 나아가서 만약 debug, release 빌드 타입에 따라서 추가적으로 다른 dependecy 를 설정하고 싶다면 configurations 에 build type을 추가하면 된다.
(sec_flavor만 debug, release 로 분화시켜 보았다.)
android {
    ...

    productFlavors{
        sec_flavor{
            minSdkVersion 17
            targetSdkVersion 22
        }
        lge_flavor{
            minSdkVersion 17
            targetSdkVersion 23
        }
    }
}

configurations {
    sec_flavorDebugCompile
    sec_flavorReleaseCompile
    lge_flavorCompile
}

dependencies {
    sec_flavorDebugCompile fileTree(dir: 'sec_debug_libs', include: ['*.jar'])
    sec_flavorReleaseCompile fileTree(dir: 'sec_release_libs', include: ['*.jar'])
    lge_flavorCompile fileTree(dir: 'lge_libs', include: ['*.jar'])
}
Leave a Comment